Sunday, January 8, 2017

The Deep Field Series

Illuminated Works 
Artista Bottega St Paul, MN 
April 2nd- 30th 2016


Exhibition Statement 

Between December 18 and 28, 1995 the Hubble Telescope's Wide Field and Planetary Camera focused in a section of the sky with very few stars. 342 images from the 10 day period were compiled to give us the earliest images of the universe.

The striking images that the Hubble has given us has inspired me for as long I have seen them. Those images give us a greater understanding of our universe galaxy and our plant. They also give more to question and understand. 


“When I reach for the edge of the universe, I do it knowing that along some paths of cosmic discovery, there are times when, at least for now, one must be content to love the questions themselves.” - Neil deGrasse Tyson Natural History Magazine, July 1996

Tuesday, July 15, 2014

New Table Saw

The garage can be a tight fit trying to make everything fit and workable in the shop. 
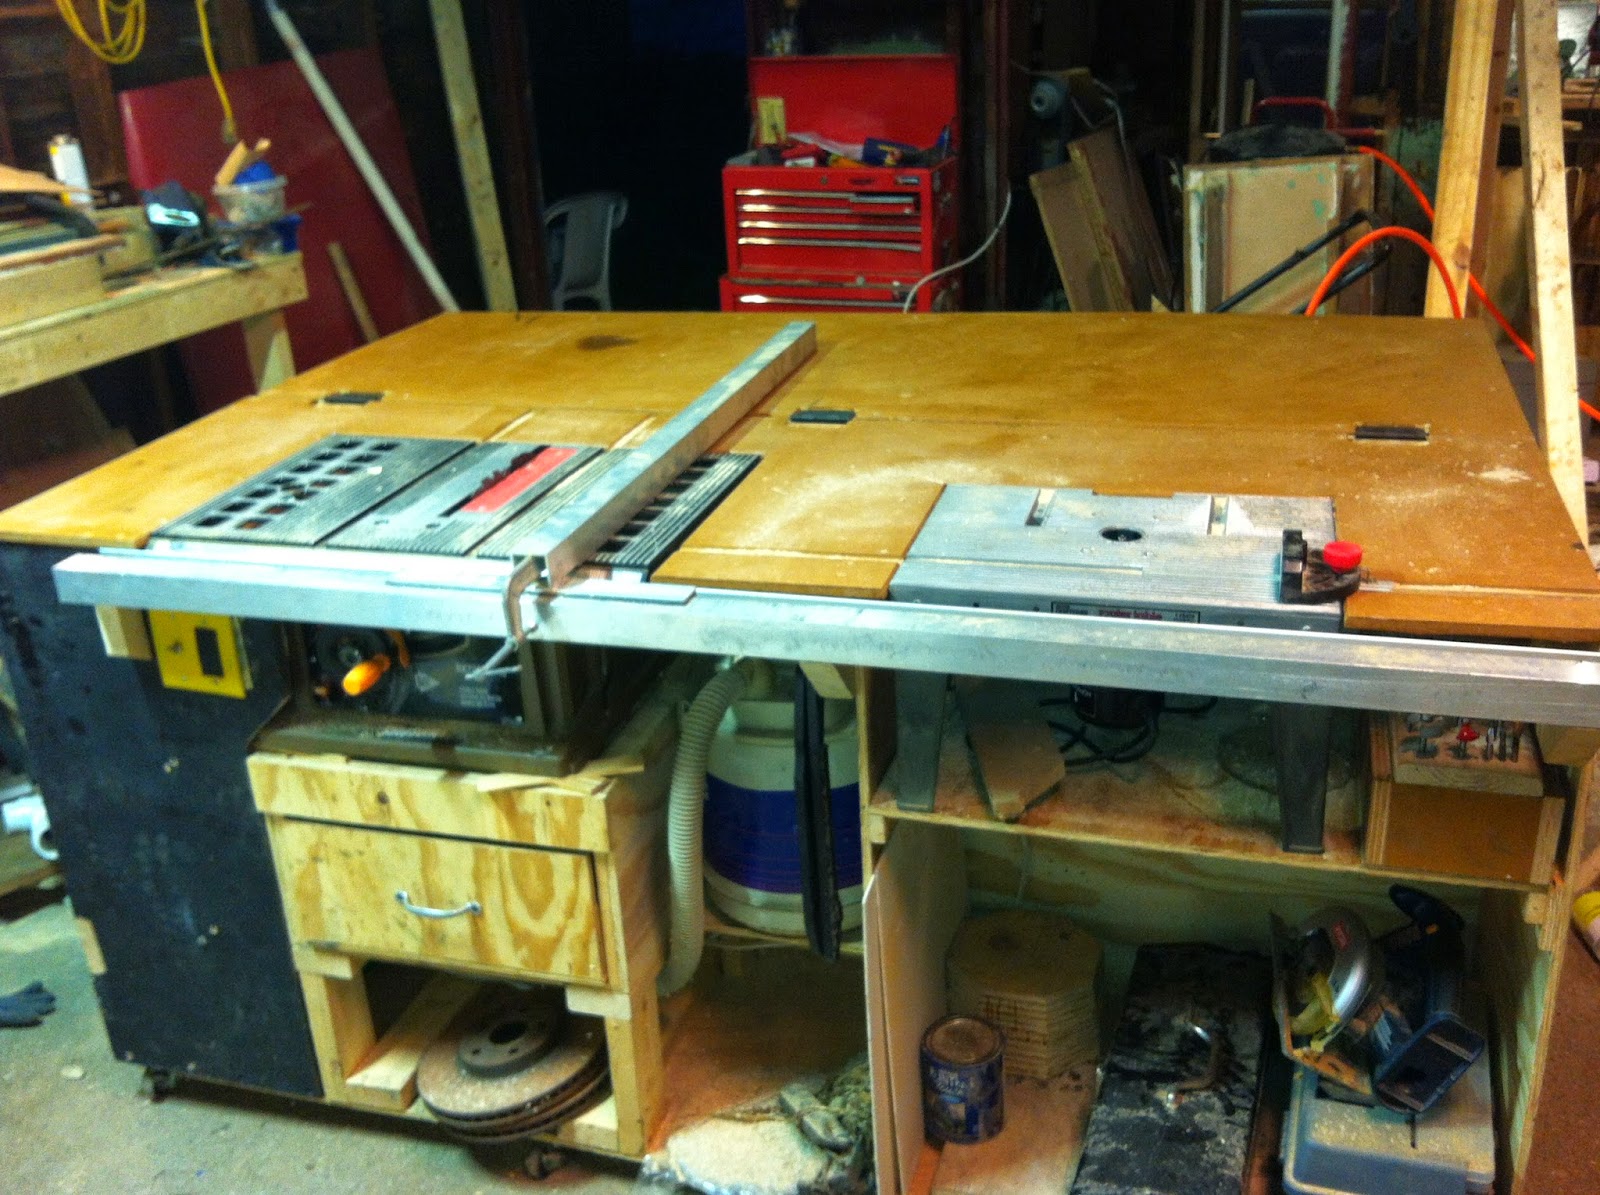
So I made a table saw/router table that folds in to a work table. You know to save on space. It ended up being more complex of a build than I thought. But it still seams relatively simple.

The Ideas was to cut the out feed table in half and put it on hings. 


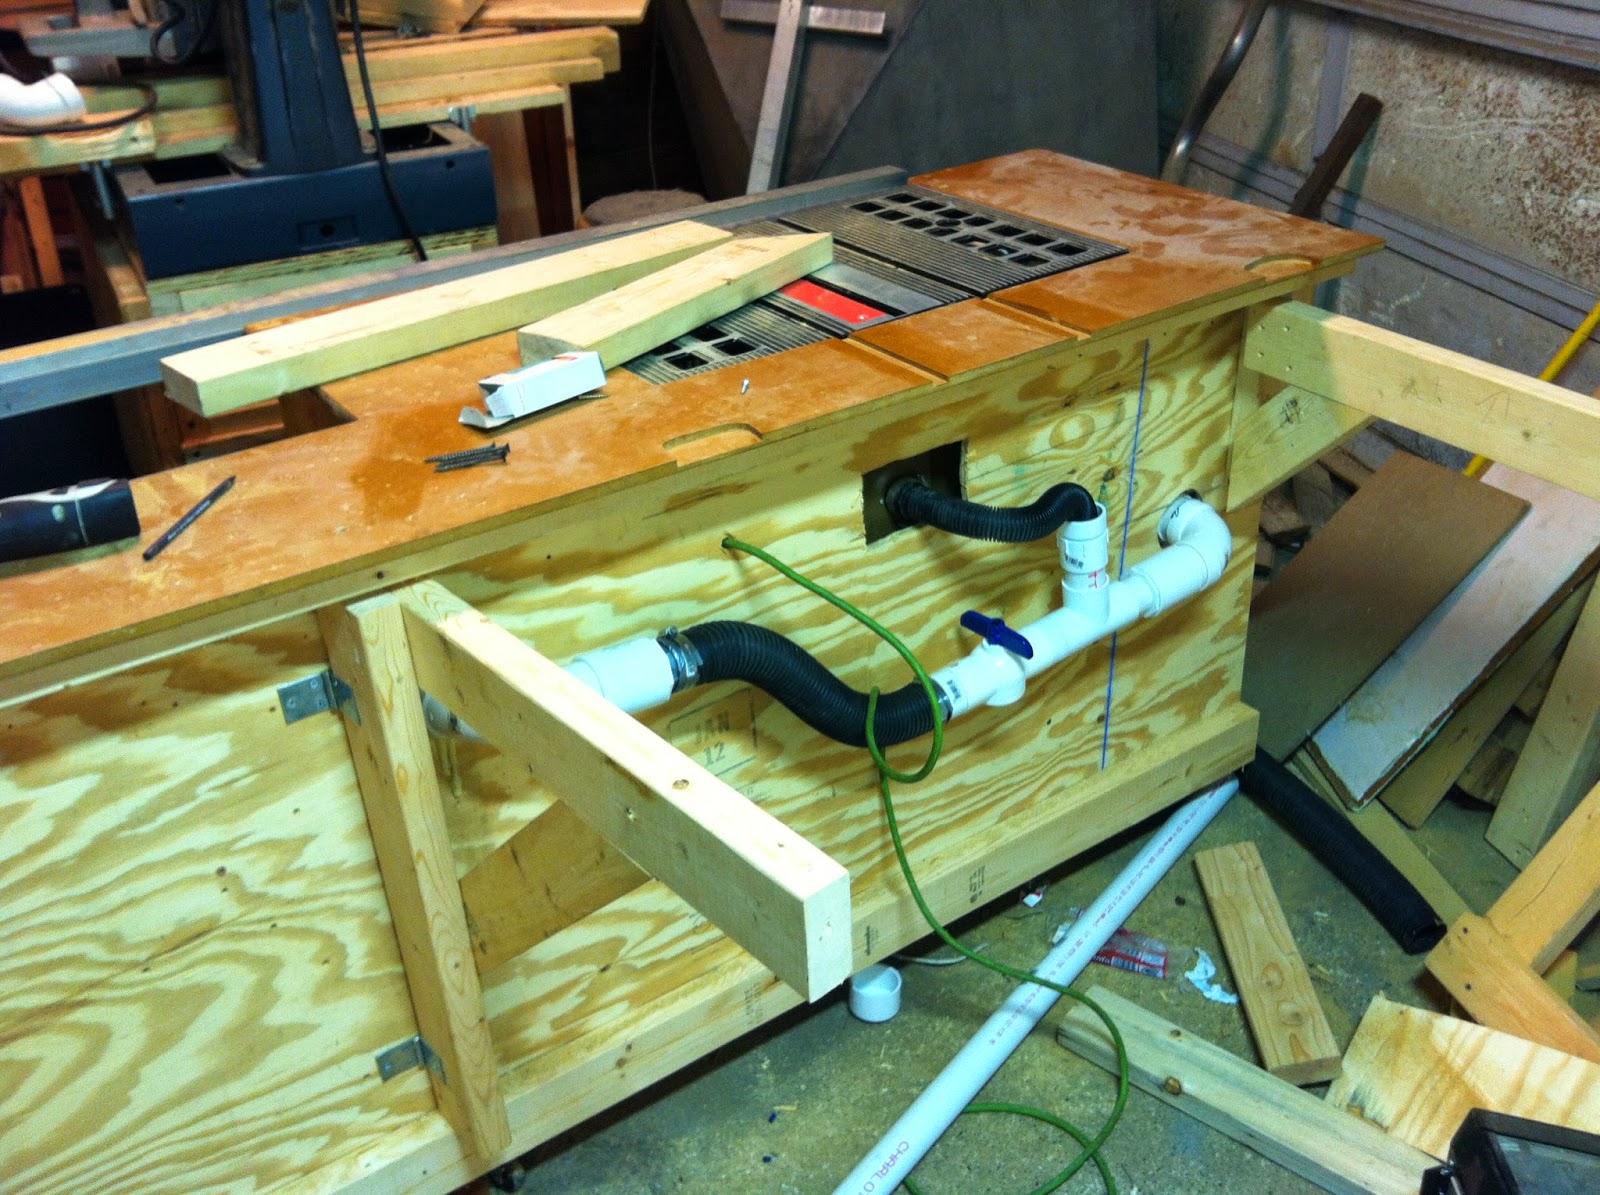
It also has dust collection with a chip separator (a 5 gallon bucket) that ties in to the table saw and the router. There is also collection for duct and debris that the vacuum does not get.  Every thing is wired in to one main (and much larger) power switch with a toggle between the router and the saw. Only one tool can be use at a time. I am planning to make a large stop "swtich" so shut off can be done vary easily.


I still have to figure out what kinds of things will be stored on it and how, I'm thinking drawers.


The back side has the power cord, dust collection and supports for the out feed table. The supports are hinged and fold up under the lip on the backside of the table. Most everything is flush(ish) with the back of the table.


I could not easily get the hinges I wanted so I modified door hinges to slide up and down just enough so that when folded it laied flat and dropped down so that the feed surfaces where flush and nothing would catch coming out of the saw.  The out feed table is .5" MDF lacquered to seal it and the work table is .5" Plywood screwed together. If any part needs replacing it can be taken apart.


It's solid, but not a workbench I would do and heavy pounding or the like on it and you really can't clamp to the table either.  Assembly, other pep or finish work the table will work nicely. The nice thing is feed surface of the table saw will stay protected, you should NEVER do work on the out feed table.

 A set up like this makes a $100 table saw just as useful as a $5000 saw.  Maybe lacking some of the power but...


Sunday, January 19, 2014

Bathroom Part 4, Built in Cabinets

I salvaged the cabinets from the bathroom with the intent of putting them back in to the room. The ceiling is pitched so there is limited useable space, but I can put them back in to the walls. They are in and ready for the sheet rock, well cement board, to go in.


'


The first cabinet was under the window forming a kind of vanity. It appears to have been made from an old shipping create, with the address still on it. 


The second came from the pantry off the kitchen. That is now the laundry room.  I move the washer and dryer out of the 100 year old lime stone basement. With cabinet and drawers built in I get more use out of the room with out using up the limited floor space.


Monday, January 13, 2014

Bathroom Part 3, Rough Work

With demo all done its time to do the hard work. I pulled the cast iron stack and replaced it with ABS so I could rough in the new plumbing.  New wiring and lighting went in. There was only one outlet in the bathroom, one light, and no vent fan. Now there are 5 lights, 4 reassessed in the peak and one by the sink, multiple GFI outlets to go in as well as a vent fan in the only place I could figure it can go.  The room was not insulated. I put in foam board in and when the roof gets done it will be ready for venting.


Since I pulled the radiator and I had a 3" step to make up I decided on radiant floor for the heat.  I also don't have to try and figure out where to put the radiator.


The radiant floor even went in to the shower pan.


The shower is going to get glass block in the window.
I still have somethings to finish up the shower and tub drains as well as putting the built-ins back in. 


I have to start thinking about tile, fixtures, and colors.

Friday, January 10, 2014

Bathroom Part 2, Demo

Demolition


I saved what I could when demoing the bathroom so not much. I did use the door from the stair closet and it's now the bathroom door, it matches the rest of the doors in the hall.


 Also slavaged some built-in cabatints that were around the window and where the closest thing to a vanity in the bathroom.


The added bonus was when I pulled the radiator out of the bathroom the supply pipes that  ran on the outside of the kitchen wall also went away.


Part 1

Wednesday, January 8, 2014

Bathroom Part 1, Design


When I bought the house October  2013 I new full well how much work the house might need.
The main bathroom did not have a shower only a bathtub. Most all of the rooms had hand any work done on them since the 1940's, with the expectation of the kitchen, witch is a different situation all together.  Something need to be done with the bathroom.


The picture makes it look ok. The truth is the ceiling was only about 6 feet tall with the only light on the wall. The room also had a "closet like thing at the back. It was cold and cravenness.  With limited head room and nothing in the room taking advantage of it I was always hunched over.


The bathroom is part of an addition that was made to match the original house. The floors and ceilings don't line up. The result was a small door, about 4.5 feet tall, and a 3 inch step down into the bathroom.  The room as it was conceived was (most likely) not meant to be used, something akin to an attic space.  A new design was called for.


The other side of the wall is a "second"  set of stairs that had been covered and used as a closet. The closet while large is not very useful and useable only from the hall. I decided to use part of it in the bathroom to get some more head room. In order to get the required head room for a shower it had to either go over the stairs by door or into the small dormer. I decided to place the shower in the dormer even though the plumbing will get tricky but I figured that it would be better to have the sink closest to the living area.

I plugged all of the measurements and dimensions into Illustrator. I moved things around until I came up with a layout I liked.


Part 2, here


Monday, August 19, 2013

Curtain Rod

While I was welding up the light for my entryway, I also made curtain rod holders. I got the curtain rod from my parents garage, they think it was in their house when they bought it. I did not have a way to hang it so I welded up this.