Showing posts with label project. Show all posts

Tuesday, July 15, 2014

New Table Saw

The garage can be a tight fit trying to make everything fit and workable in the shop. 
So I made a table saw/router table that folds in to a work table. You know to save on space. It ended up being more complex of a build than I thought. But it still seams relatively simple.

The Ideas was to cut the out feed table in half and put it on hings. 
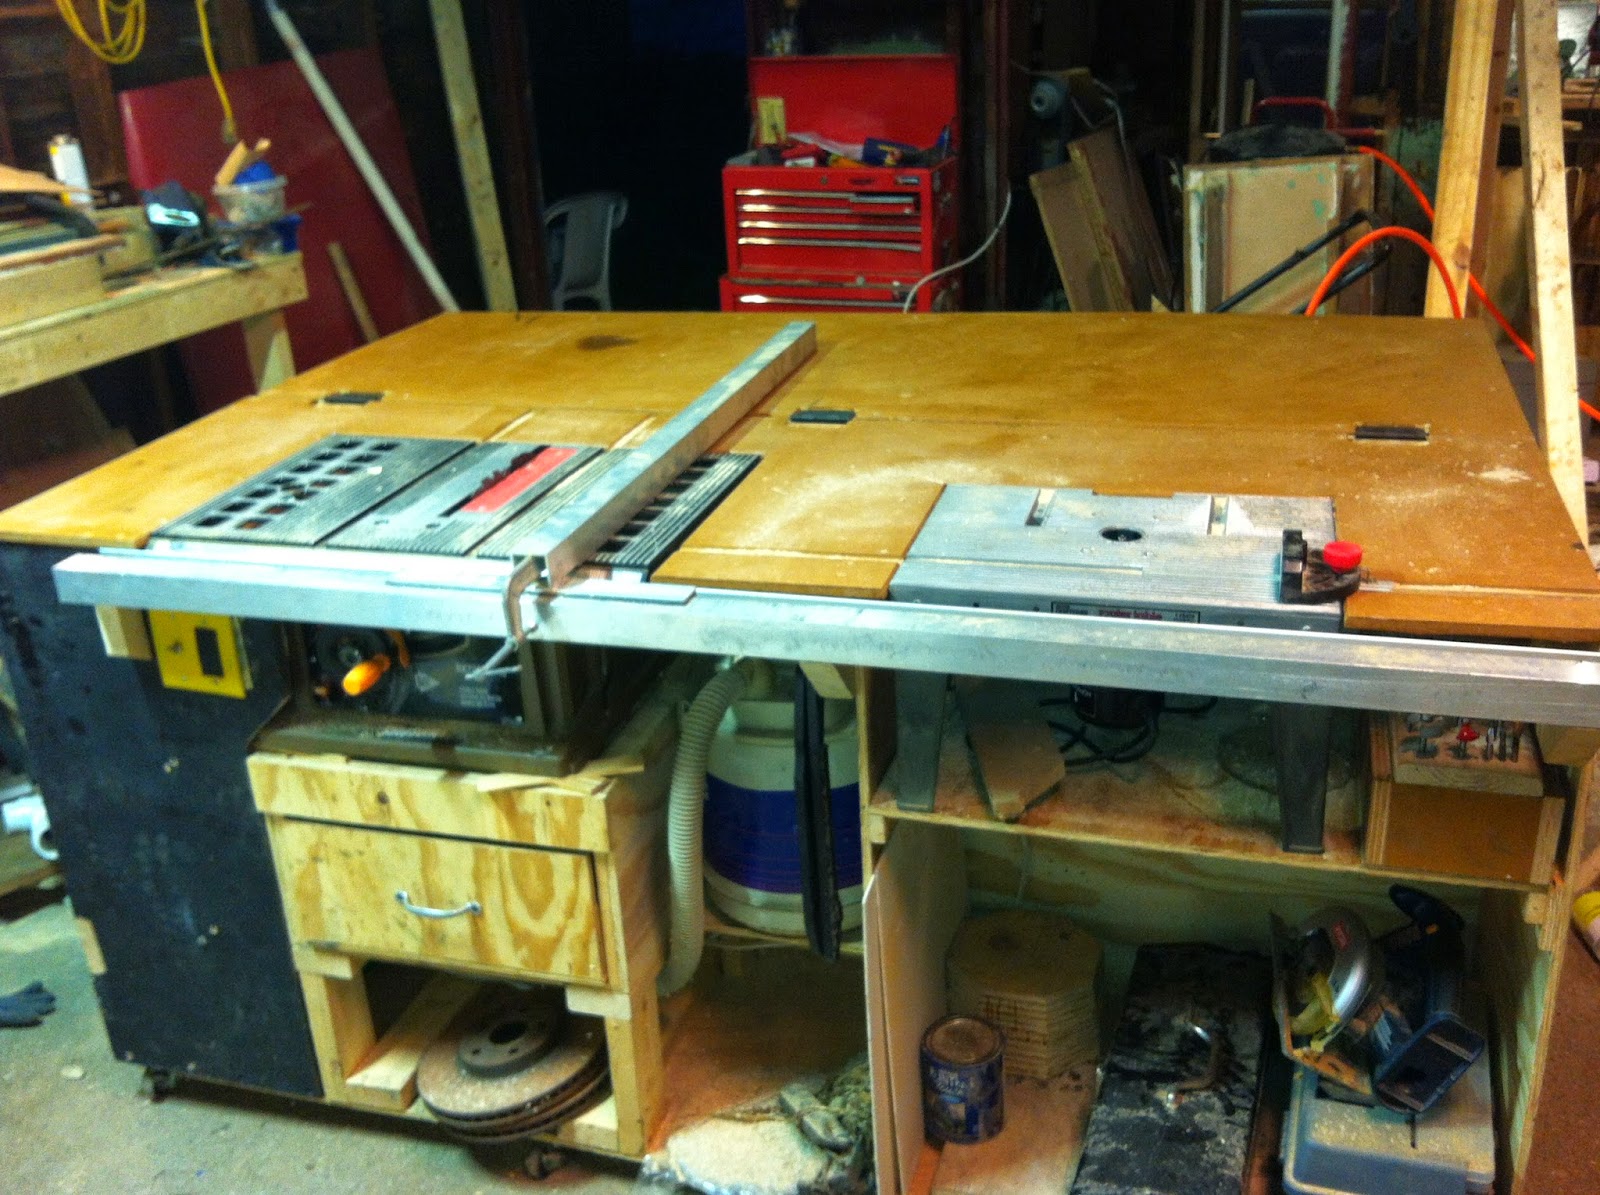

It also has dust collection with a chip separator (a 5 gallon bucket) that ties in to the table saw and the router. There is also collection for duct and debris that the vacuum does not get.  Every thing is wired in to one main (and much larger) power switch with a toggle between the router and the saw. Only one tool can be use at a time. I am planning to make a large stop "swtich" so shut off can be done vary easily.


I still have to figure out what kinds of things will be stored on it and how, I'm thinking drawers.
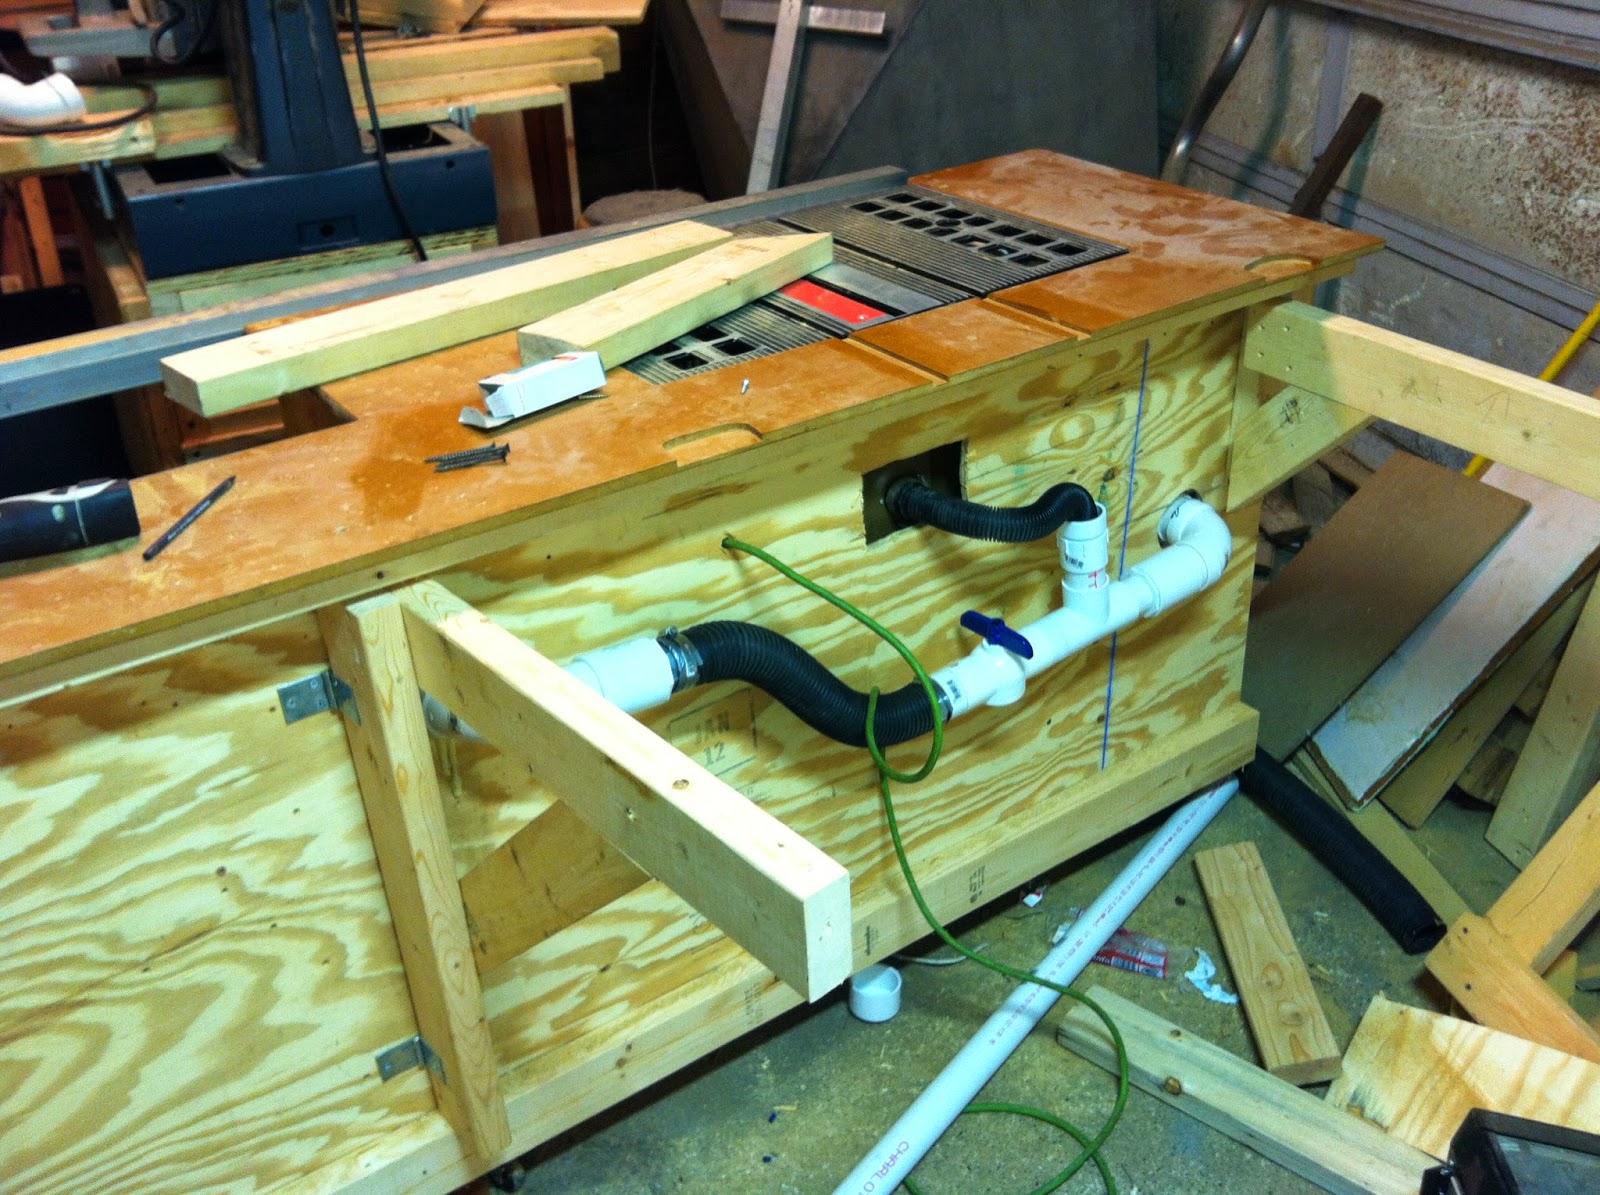

The back side has the power cord, dust collection and supports for the out feed table. The supports are hinged and fold up under the lip on the backside of the table. Most everything is flush(ish) with the back of the table.


I could not easily get the hinges I wanted so I modified door hinges to slide up and down just enough so that when folded it laied flat and dropped down so that the feed surfaces where flush and nothing would catch coming out of the saw.  The out feed table is .5" MDF lacquered to seal it and the work table is .5" Plywood screwed together. If any part needs replacing it can be taken apart.


It's solid, but not a workbench I would do and heavy pounding or the like on it and you really can't clamp to the table either.  Assembly, other pep or finish work the table will work nicely. The nice thing is feed surface of the table saw will stay protected, you should NEVER do work on the out feed table.

 A set up like this makes a $100 table saw just as useful as a $5000 saw.  Maybe lacking some of the power but...


Wednesday, January 8, 2014

Bathroom Part 1, Design


When I bought the house October  2013 I new full well how much work the house might need.
The main bathroom did not have a shower only a bathtub. Most all of the rooms had hand any work done on them since the 1940's, with the expectation of the kitchen, witch is a different situation all together.  Something need to be done with the bathroom.


The picture makes it look ok. The truth is the ceiling was only about 6 feet tall with the only light on the wall. The room also had a "closet like thing at the back. It was cold and cravenness.  With limited head room and nothing in the room taking advantage of it I was always hunched over.


The bathroom is part of an addition that was made to match the original house. The floors and ceilings don't line up. The result was a small door, about 4.5 feet tall, and a 3 inch step down into the bathroom.  The room as it was conceived was (most likely) not meant to be used, something akin to an attic space.  A new design was called for.


The other side of the wall is a "second"  set of stairs that had been covered and used as a closet. The closet while large is not very useful and useable only from the hall. I decided to use part of it in the bathroom to get some more head room. In order to get the required head room for a shower it had to either go over the stairs by door or into the small dormer. I decided to place the shower in the dormer even though the plumbing will get tricky but I figured that it would be better to have the sink closest to the living area.

I plugged all of the measurements and dimensions into Illustrator. I moved things around until I came up with a layout I liked.


Part 2, here


Saturday, August 17, 2013

Entryway Light

The did not have a light when I bought the house. It does have a switched electrical outlet up about 8 feet up and a hole in the ceiling where a light used to hang. I constructed a wall light. 


 Basically, I welded to pieces of angle steel and a piece of plexiglass. I wired three lights and a plug together so it could be plugged in.

Wednesday, March 6, 2013

Oh... So Far Behind.

So in buying a house you lose so much time to everything else. So much wiring to fix and plumbing to get up to this century (we are 13 years into it). The new studio space is workable and once the weather breaks I can get it to were i want it. But the thing that bothers me is how is it with for wall mounted lights none of them are the same. I don't know what to do with them. I can't really do a cool door way with one on each side... They don't match.

Wednesday, September 5, 2012

Making Fire Hotter

I grabbed some galvanized pipe a cheap regulator valve to attach to the air line off the compressor. That gave me a way to crank the air going in to the "fire pit" to make it nice and hot for heating steel. 
Easy to make and effective although it worked the compressor, not something to do with any regularity.    Less than $10 dollars to make and even less time to put together.


I made the wood base just to hold it in place and it acts as a heat shield.

Thursday, January 5, 2012

Never enough hours in the day...

So many things I would like to build and I never stop coming across projects I would like to give a go,
and here is another....


Speaking of engines animatedengines.com 

Friday, September 23, 2011

Welding With Car Batteries

I am always on the look out for things that will come in handy for after when the Zombies come. 
This will do nicely


Check out the full how to at MAKE here.

Monday, July 11, 2011

Fixing the shop floor.

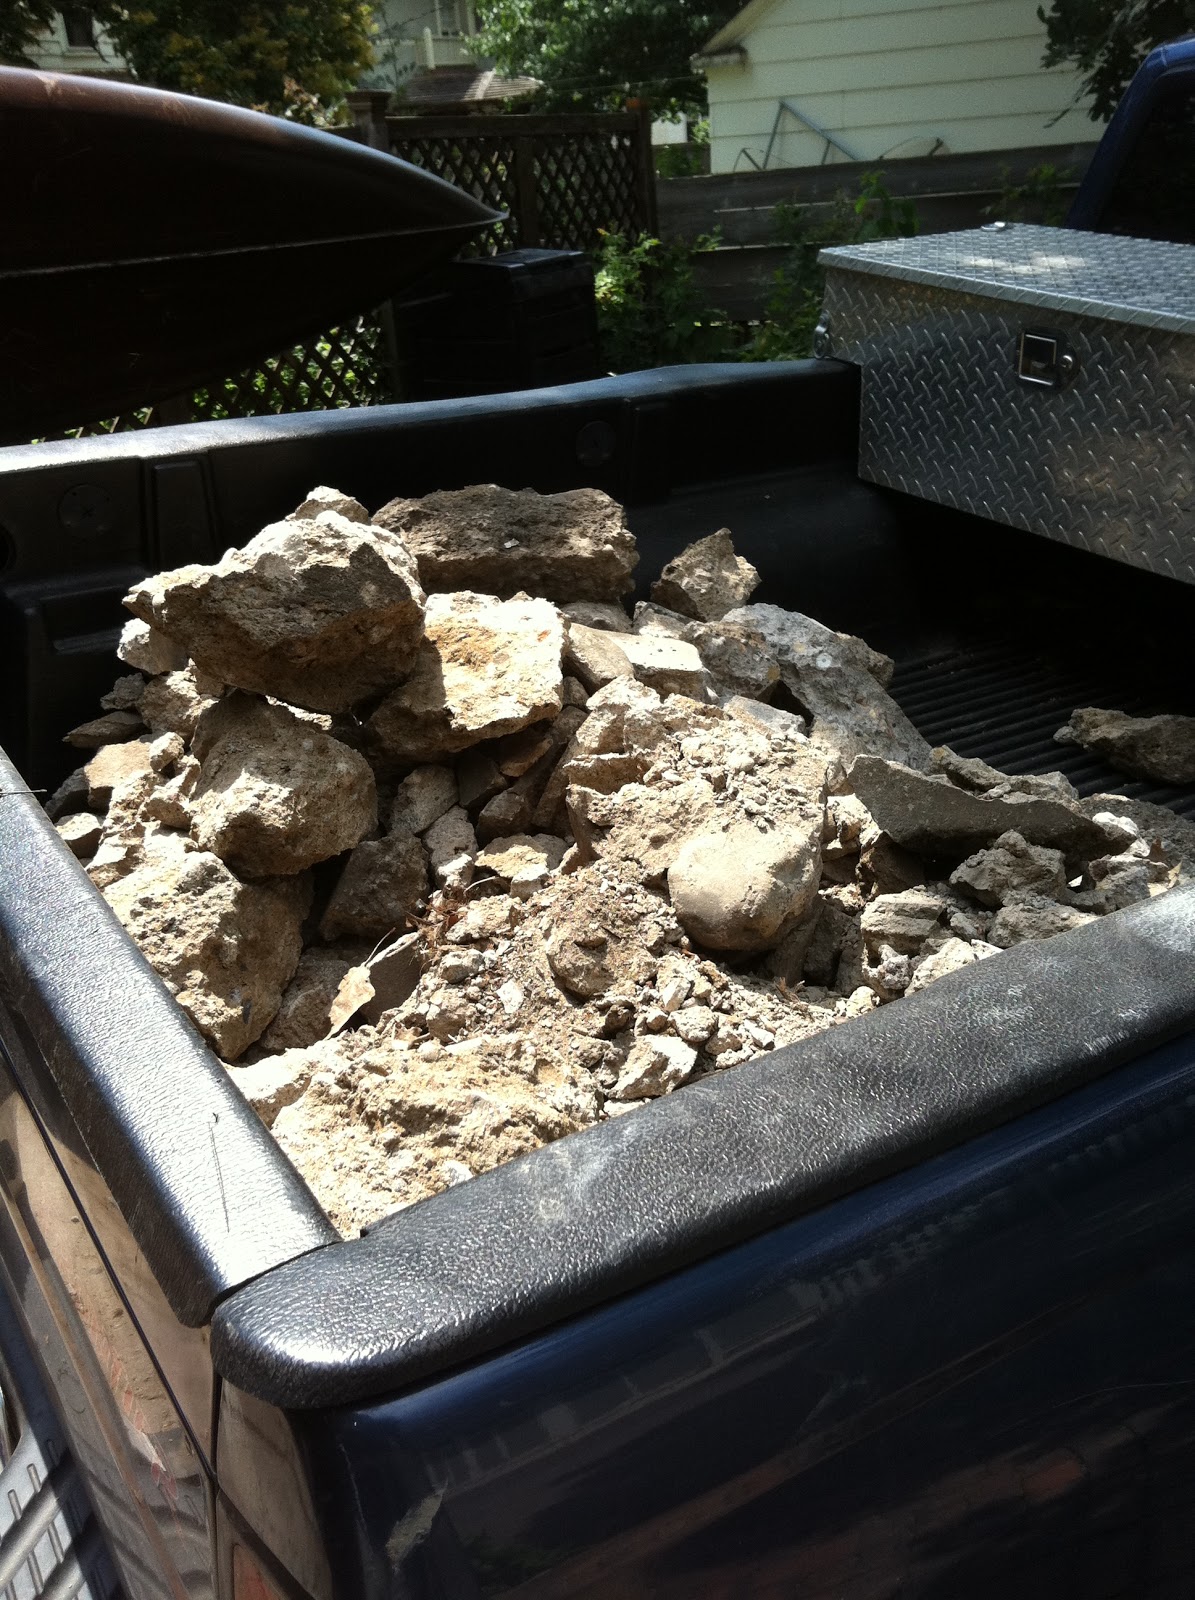
The garage floor was in pretty bad shape but two sledge hammers and sixteen bags of concrete later... much better. 


 I scored the floor with a masonry cutting wheel on my 4.5'  angle grinder and it broke of nicely with the sledge hammer... except for the spot where the concrete was 15" deep.


Friday, June 24, 2011

wood turning round 1

I finally fired up the wood lathe today.
I sharpened my chisels, started turning and I realized that the previous owner of the lathe had the pulley on the motor mounted wrong, so fixed that.
I put laminated MDF on the lathe to see how it would spin. The stuff turns well.
The finish was smooth, but working it is like standing in a dust collector.


I have been gluing up all kinds of scrap from the shop as a way to start. I have some plywood, MDF, and OSB waiting to go on the lathe. I am interested to see how the OSB turns out.


I have two blanks about the same size. I'm thinking a lacquer finish on them.

Tuesday, June 14, 2011

storage

I got a wood lathe a few weeks ago (haven't used it yet). Made this little storage and pedestal for the grinder and all the tools and parts for the lathe.

Tuesday, May 17, 2011

Saturday, May 14, 2011

Kickstarter

Thursday night I got an email from a friend of mine and he had just gotten his Kickstarter project up and running. I was not familiar with Kickstarter until Adam told me about the project he was putting together.  So, I am not sure how I missed hearing about Kickstarter until now. Kickstater is a web site where creatives can find funding for projects, movies, books, and art (like Adams paintings).
So check out Adams Kickstarter project here and check out his video. 


Adam has been trying to convince me to put together a project but all I got is "You should help me with art like stuffs."


http://adamconsidine.com/
http://adamconsidine.blogspot.com/
http://www.kickstarter.com/projects/1027384279/a-new-series-of-paintings

Monday, May 9, 2011

Dog House

I came up with this design for a dog house some time ago (maybe last the end of summer). I wanted to design a dog house that would be simple and minimal. So I fired up SketchUp and made a rendering of it. It is large about 8'x4'x3' and is designed with a weather barrier on the inside. 


I also put together a Illustrator file as a drawing and reference.

Tuesday, April 26, 2011

Sr. Pictures (my lil' sister)


These are my favorites from the shot I did with my sister for her Senior Pictures. We went down by the Stone Arch Bridge not far from De La Salle High School (from witch she will graduate in May). She Picked this location because of how it was a part of her high school experience. 

Thursday, January 13, 2011

Greetings Mr. Saatchi

 
How do you identify an artist whose work you would like own in your collection?
What do you look for in an artist? 
What catches your attention in a piece of art?

Where do you look for art? 
Where do you find artists?
Are art “hot spots” more convenient than creative? 
Does location define artists or should artists define a location?

Thank for your time,
Mark Brady 
mbradystudios@gmail.com